
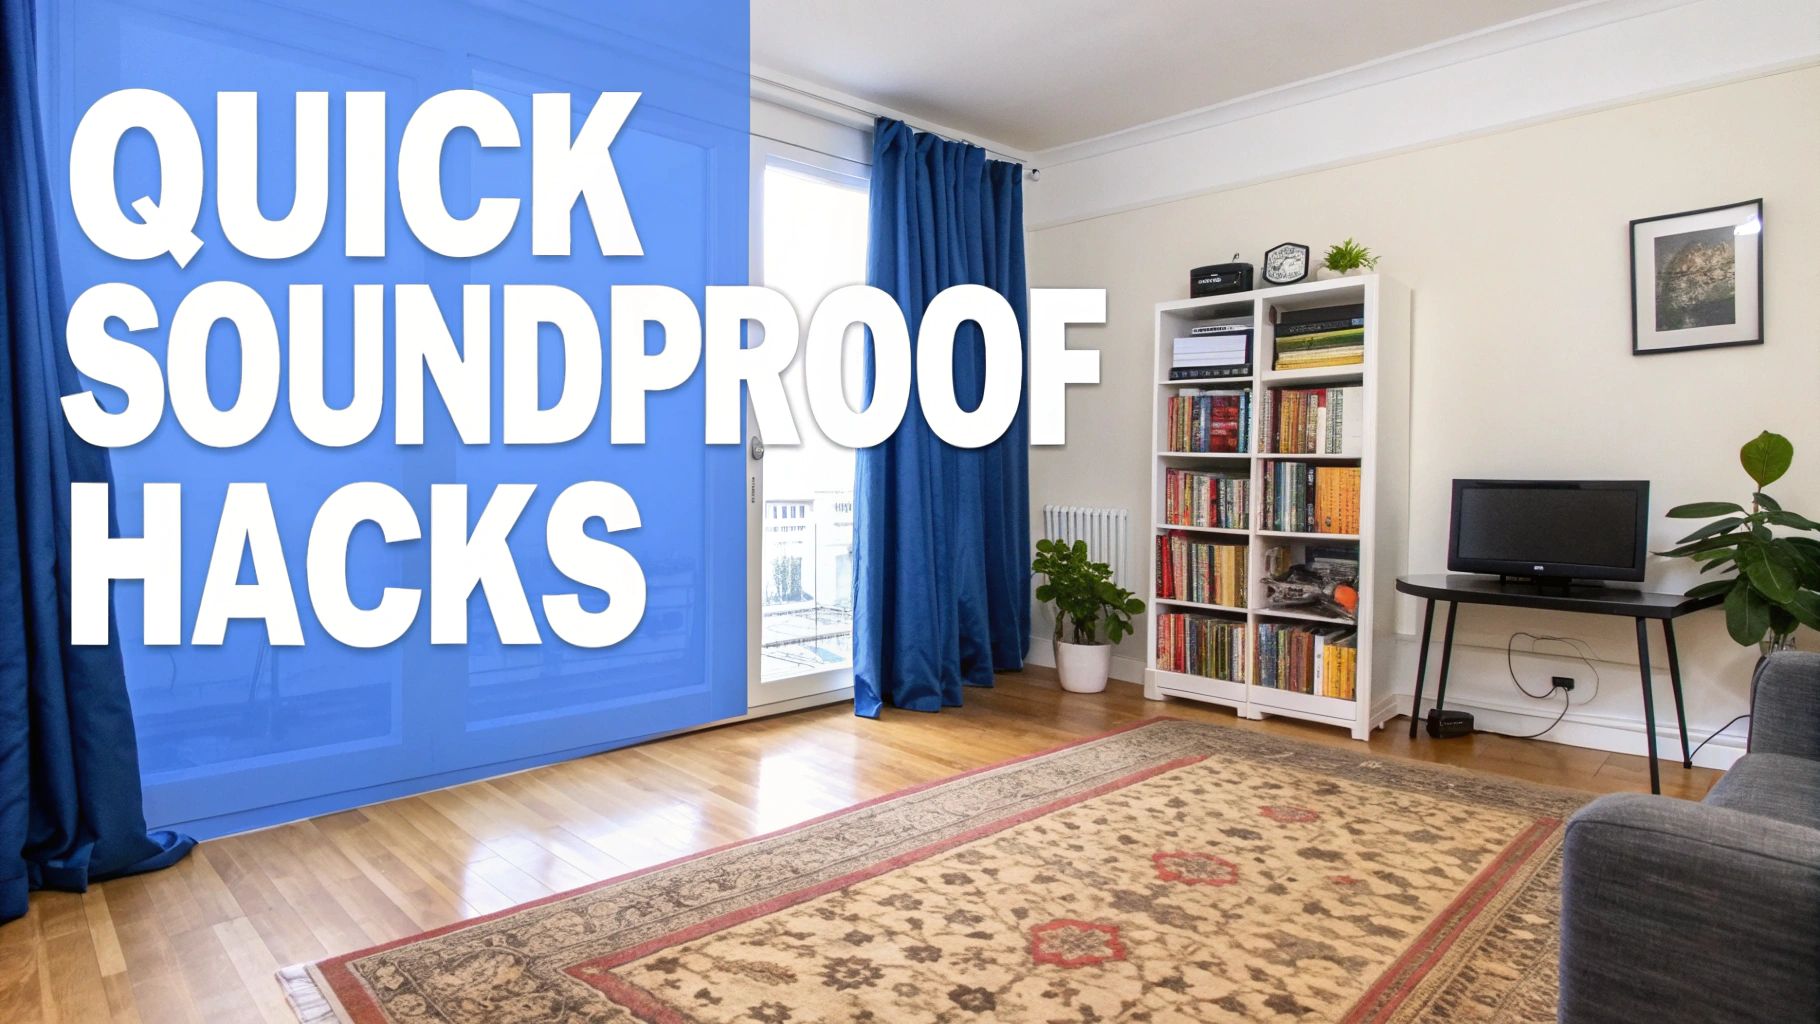
How to Soundproof a Room for Total Peace and Quiet
- Justin McCurdy

- Nov 6, 2025
- 17 min read
Welcome to your friendly guide for reclaiming some peace and quiet! When you want to soundproof a room, it really comes down to two main game plans: sound absorption and sound blocking. Think of it this way—absorption soaks up echoes inside a room, making it feel cozier, while blocking puts up a wall to stop noise from getting in or out in the first place.
Your Starting Point for a Quieter Home

Before you run out and buy a single acoustic panel or tube of caulk, it’s a good idea to do a little detective work. What's the actual noise problem you're trying to solve? Are you dealing with airborne noise, like chatter seeping in from the next room? Or is it impact noise, like the thud of footsteps from the floor above?
Knowing your enemy is half the battle. Seriously. Trying to stop the low rumble of traffic on a busy road in White Marsh, Maryland, is a totally different challenge than muffling the high-pitched sounds of a video game bleeding through a shared wall. Pinpointing the source and type of sound saves you from wasting a ton of time and money on solutions that just won't work for your specific issue. For example, a heavy rug is great for footsteps but won't do much against the neighbor's TV.
Absorption vs. Blocking: The Two Pillars of Soundproofing
Getting a handle on these two core ideas is key. Absorption is about taming the sound that’s already in your space, while blocking is about building a fortress to keep outside noise from ever getting in.
Here's a quick rundown with practical examples:
Sound Absorption: This is all about killing echo and reverb. Soft, porous materials—think thick rugs, heavy curtains, or even a plush sofa—are great at trapping sound waves and stopping them from bouncing all over the place. It's what makes a room feel calmer and more serene, kind of like a library.
Sound Blocking: The mission here is to physically stop sound from passing through your walls, floors, or ceilings. To do that, you need to add mass and density. We're talking about things like solid-core doors, double-pane windows, or even just pushing a heavy bookshelf against a shared wall. These create a serious barrier that sound waves just can't push through easily.
To really get the distinction, it helps to see them side-by-side.
Sound Absorption vs Sound Blocking at a Glance
This table breaks down the fundamental differences between absorbing sound within a room and blocking it from entering or leaving.
Concept | Primary Goal | Common Materials | Best For |
|---|---|---|---|
Sound Absorption | Reduce echo, reverb, and noise within a room. | Acoustic panels, foam, thick rugs, heavy curtains, tapestries. | Improving speech clarity, recording studios, home theaters, reducing harshness in a "live" room. |
Sound Blocking | Prevent sound from traveling between spaces. | Mass-loaded vinyl (MLV), drywall, solid-core doors, double-pane windows. | Keeping street noise out, containing a loud media room, ensuring privacy in an office. |
Most of the time, the best approach is a mix of both.
The most effective soundproofing plans often combine both absorption and blocking. You might use a heavy rug to absorb the sound of footsteps and install a solid door to block conversations from the hallway. It’s all about creating multiple layers of defense.
The demand for a quiet escape at home is bigger than ever, especially with so many of us working remotely or setting up home studios. In fact, the global market for indoor soundproof rooms is expected to hit $862 million by 2025, a clear sign that people are investing in peace and quiet.
While fixing up your current home is a fantastic project, thinking about this stuff when you're choosing finishes for a new home is even better. A peaceful home is a happy one, and small choices can make a big impact. When buyers work with us to customize their homes in communities across Baltimore County and Harford County, they get to pick flooring, countertops, and more. We help them make smart choices, like selecting a plush carpet for bedrooms to naturally dampen sound, which is a huge part of our guide to customizing your home.
To get started on the right foot, it’s worth spending a little time understanding room acoustics, as it’s the foundation for managing sound effectively.
Easy Soundproofing Hacks You Can Do This Weekend
You don't need a full-on renovation to get a little peace and quiet. Some of the biggest wins come from small, strategic changes you can knock out in a single afternoon. Let’s dive into some high-impact, low-effort ways to start soundproofing your room right now.
First things first, look for gaps. Sound acts a lot like water—it’ll find any little crack or opening to pour through. Your doors and windows are almost always the main culprits.
If you can see daylight peeking around your door frame, you’ve found a major sound leak. The fix is incredibly simple and effective: weatherstripping. It's just a self-adhesive foam or rubber seal that you press into the door jamb. When the door closes, it creates an airtight seal that blocks a surprising amount of noise. You can find it at any hardware store.
Seal The Deal With Doors And Windows
To really finish the job on your door, add a door sweep. This is a flexible strip that attaches to the bottom of your door, closing that annoying gap between the door and the floor. You can find all kinds of styles, even slide-on versions that don’t require a single screw.
Here’s a quick tip for picking the right one:
For hard floors like wood or tile: Go for a sweep with a soft, pliable rubber or vinyl seal. It won’t scratch the surface.
For carpeted floors: A bristle or brush-style sweep is your best bet. It can glide right over the carpet fibers without snagging.
These two small additions are your first line of defense, and they can make a noticeable difference for less than the cost of a dinner out.
Use Your Furniture As A Sound Barrier
Next, take a good look at your room's layout. You can turn your existing furniture into a powerful—and free—soundproofing tool. Soft, plush items like sofas and upholstered chairs are fantastic at absorbing sound waves, which cuts down on echo and makes the whole room feel quieter.
The real pro move, though, is using dense furniture to block sound. Got a shared wall with a noisy neighbor or a loud TV room? Try pushing a heavy, loaded bookshelf against that wall. You're adding a ton of mass, making it much harder for airborne sound to get through. The more books and heavy objects you can pack on those shelves, the better it will work.
A fully stocked bookshelf can be a surprisingly effective sound barrier. The combination of dense wood and the varied shapes and mass of the books helps to both block and scatter sound waves, disrupting their path from one room to the next.
This same idea applies to other heavy furniture like dressers or large cabinets. Simply rearranging your room can be one of the most effective soundproofing hacks you can do without spending a dime. It's especially handy when setting up a functional workspace; check out our guide on fresh home office design ideas for more tips on creating a productive environment.
Harness The Power Of Textiles
Never underestimate the acoustic power of fabric. Hard surfaces—hardwood floors, bare walls, uncovered windows—are basically trampolines for sound, creating echoes that make a room feel loud and harsh. Adding soft textiles is the fastest way to soak up all that energy.
Start with a thick, plush area rug. If you have hardwood or laminate flooring, a large rug can dramatically muffle the sound of footsteps and absorb ambient noise. The thicker and denser the rug (and the rug pad underneath), the more effective it's going to be.
Now, turn your attention to the windows. Swapping out thin, flimsy blinds for heavy, thick curtains is a game-changer. These curtains don’t just block light; they also soak up sound coming from outside. According to a report by Fortune Business Insights on the rise of acoustic textiles, the global market for soundproof curtains hit USD 2.45 billion in 2024, driven by people creating quiet home theaters and personal sanctuaries. They really work.
Don't forget the walls! A large fabric tapestry or wall hanging can add a pop of style while also taming echoes. Think of them as decorative acoustic panels, and they're often a much more affordable option. By layering these simple textile solutions, you can seriously soften the sound in any room this weekend.
Advanced Techniques for Serious Noise Problems
So, you’ve tried the soft rugs and plugged the gaps with weatherstripping, but the noise just won't quit. When the simple fixes don't cut it, it's time to get serious. If you're dealing with the thumping bass from a home theater or the relentless rumble of traffic, you need to think more structurally. We're moving beyond surface-level tweaks and making your walls, floors, and ceilings do the heavy lifting.
The two core strategies here are adding mass and decoupling. Adding mass is pretty much what it sounds like—making surfaces denser so sound waves struggle to push through. Decoupling is a bit more clever; it's about physically separating layers of a structure to stop vibrations dead in their tracks.
Adding Mass: The Wall-Strengthening Strategy
One of the most straightforward ways to add significant mass to a wall is by installing a second layer of drywall. For the cost and effort involved, this technique is surprisingly effective. But if you want truly impressive results, you can sandwich a high-density material between the two layers.
This is where Mass-Loaded Vinyl (MLV) comes into play. MLV is a thin, heavy, and flexible sheet of vinyl packed with metal particles. It's incredibly dense for its thickness, which makes it a sound-blocking superstar.
How it works: You install the MLV directly onto your wall's studs or even over your existing drywall. Then, you cover it all up with a fresh layer of drywall.
Best for: It’s fantastic at blocking airborne noise like conversations, music, and TV sounds. I've seen it work wonders for home offices, nurseries, or bedrooms that share a wall with a noisy living room.
Think of it like this: trying to push open a flimsy screen door is easy, but good luck moving a heavy bank vault door. Sound waves just don't have enough oomph to move the heavier, denser wall.
The Power of Decoupling: Stopping Vibrations in Their Tracks
Decoupling is where soundproofing gets really interesting. It’s your ultimate weapon against low-frequency, structural noise—the kind you feel as much as you hear, like footsteps from the floor above or the bass from a beefy sound system.
The whole point is to create a physical break in the structure so vibrations can't travel from one side to the other. Imagine the old two-tin-cans-and-a-string telephone; decoupling is like snipping that string. Resilient channels and sound isolation clips are two of the most common ways we achieve this.
Decoupling is arguably the most effective single strategy for soundproofing a room, especially against low-frequency sounds. By creating a 'floating' wall or ceiling, you prevent sound vibrations from physically passing through the building's frame.
For instance, if you're serious about building a dedicated home theater, decoupling the walls and ceiling is pretty much non-negotiable. It's the only real way to contain that powerful movie sound so it doesn’t rattle the rest of the house. For a closer look at creating the perfect media space, check out our guide on making home entertainment room design easy.
Getting a Handle on STC Ratings
As you start shopping for these kinds of materials, you’ll run into a key metric: the Sound Transmission Class (STC) rating. An STC rating is just a number that tells you how well a wall or material assembly blocks airborne sound. Higher numbers are better. Simple as that.
A typical interior wall has an STC of around 35. You can easily hear loud speech through it.
Adding a second layer of drywall can get you to an STC of 40-45, which makes loud speech sound muffled.
A fully decoupled wall with MLV and insulation can hit an STC of 60+, making most sounds completely inaudible.
Focusing on materials with high STC ratings is key to a successful project. It's no surprise the global acoustic insulation market was valued at around USD 16.2 billion in 2024. More and more people are realizing how much noise pollution affects our health and focus, and that demand is pushing companies to develop better materials.
These advanced techniques are perfect for upgrading an existing home, but it's even easier to plan for quiet when you're already making choices for a new home. When I work with clients in White Marsh or Edgewood, Maryland, we offer unique visualization tools to see how different choices in flooring or insulation will impact a room's acoustics. It lets us help you create a peaceful sanctuary from day one, perfectly tailored to your lifestyle.
Bolstering Your Weakest Links: Doors and Windows
Think about it this way: you could build the thickest, most soundproof walls known to man, but if you leave the door open, it’s all for nothing. When it comes to soundproofing a room, your doors and windows are that open gate. More often than not, they’re the main culprits letting all that unwanted noise come crashing in.
So, let's get tactical and reinforce these weak spots. Honestly, this is where you’ll see some of the most dramatic results in your quest for quiet.
From Hollow and Echoey to Solid and Silent Doors
Take a knock on a typical interior door in most modern homes. Hear that hollow, empty sound? That’s a hollow-core door, and acoustically, it’s not much better than a cardboard privacy screen. They have virtually no mass to stop sound waves in their tracks.
The single biggest upgrade you can make here is swapping that flimsy door for a solid-core door. The difference is night and day. A solid-core door is dense, heavy, and a formidable barrier that sound has a really hard time getting through. Just making this one change can slash the amount of chatter, TV noise, or music bleeding in from the hallway.
But even the heaviest door is useless if there are gaps all around it. To get that truly airtight, sound-blocking seal, you have to tackle the perimeter.
Beef Up Your Seals: Don't even bother with that cheap foam weatherstripping. For real soundproofing, you need heavy-duty rubber or silicone gaskets. You install them around the entire door jamb, and when the door closes, it presses firmly against them, creating a tight lock against airborne sound.
Install an Automatic Door Bottom: That gap under the door is a six-lane highway for noise. An automatic door bottom is a brilliant fix. It’s a nifty mechanism you mount to the bottom of the door. As the door swings shut, a little plunger hits the jamb and mechanically drops a seal down tight against the floor. It's a much more effective and durable solution than a simple door sweep.
These upgrades work together to turn your door from a weak point into a solid wall of defense. And while you’re thinking about the door, don’t forget the floor it seals against! The right material can make a huge difference, which is why we often explore room-specific flooring options to round out a soundproofing project.
Securing Your Windows Against the Outside World
Windows are tough. By their very nature, they’re a hole in your wall. This is a huge issue if you live near a busy road, something we see a lot with clients in Edgewood and throughout Baltimore County. The good news is, you've got some powerful options to quiet them down.
A really effective and popular route is to use sound-dampening window inserts. Think of these as a second window pane, usually made from acrylic or laminated glass, that you pop into the inside of your existing window frame. This creates a pocket of dead air that’s fantastic at trapping sound vibrations. The best part? They're completely removable and don't require ripping out your old windows, making them perfect for renters or anyone on a tighter budget.
If you’re looking for a more permanent, high-performance fix, you can upgrade to double- or even triple-pane acoustic glass windows. These things are engineered from the ground up for noise reduction. They typically feature:
Varied Glass Thickness: The panes are made with different thicknesses to disrupt a wider range of sound frequencies.
Laminated Glass: At least one of the panes is a "sandwich" of glass with a clear, sound-dampening vinyl layer in the middle.
Inert Gas: The space between the panes is filled with a gas like argon, which is denser than air and does a better job of impeding sound.
A Quick Story From the Field: We worked with a client in Baltimore County whose bedroom faced a major road. The constant traffic noise was wrecking their sleep. We started them off with custom-fit window inserts. The change was immediate—the sharp, jarring traffic sounds were reduced to a low, distant hum. They could finally sleep through the night.
Remember, beyond big upgrades, a huge part of soundproofing is just sealing up all the existing gaps and air leaks. For a deep dive into that, this guide to weatherproofing windows and doors is a great resource. By tackling your doors and windows head-on, you're not just patching leaks—you're fundamentally strengthening your room's entire defense against noise.
Creating Your Personal Soundproofing Plan
Alright, let's get down to business and figure out a real-world strategy for your room. When it comes to soundproofing, there’s no one-size-fits-all solution. The best approach is always going to be the one you tailor to your specific noise issue, your budget, and how much work you’re willing to put in over a weekend.
First things first: you need to play detective and hunt down those sneaky sound leaks. Grab a flashlight and get ready to inspect every nook and cranny. You're searching for any gap where air—and by extension, sound—can wiggle its way through.
Your Sound Leak Inspection Checklist
The easiest way to start is with a simple light test. Turn off all the lights in the room you want to soundproof, then have a friend shine a bright flashlight from the other side of doors and along the floorboards. If you see light peeking through, you've found a sound leak.
Here’s a quick rundown of the usual suspects:
The Door: Check all four sides. Is there a big gap between the bottom of the door and the floor? Can you see daylight around the frame? That's your biggest culprit right there.
Window Frames: Take a close look at where the window assembly meets the wall. Old caulk has a nasty habit of cracking and shrinking, creating tiny gaps that let in a shocking amount of noise.
Outlets and Switches: These are basically just holes cut into your drywall. Pop off the faceplate, and you’ll almost always find a sizable gap around the electrical box itself.
Recessed Lighting: Can lights are notorious for this. They are often unsealed openings leading directly into your ceiling or the floor above.
HVAC Vents: These are literally sound highways between rooms. You can’t just block them off, of course, but there are ways to dampen the noise traveling through them.
Once you’ve mapped out your problem areas, you can start prioritizing. Trust me, sealing the gap under your door is going to give you way more bang for your buck than trying to soundproof an entire wall right off the bat.
Layering Techniques for Maximum Impact
Think of soundproofing like dressing for a cold day. A single heavy coat is good, but layering a t-shirt, a sweater, and a jacket is far more effective. The same principle applies here—every layer of defense you add makes your room a little bit quieter.
Here’s what a great, no-demolition strategy might look like:
Tackle the Door First: If you have a flimsy, hollow-core door, swap it out for a solid-core one. Then, add high-quality weatherstripping around the frame and install an automatic door bottom to seal that gap underneath completely.
Soften the Surfaces: Lay down a thick, plush area rug over a dense rug pad. Hang some heavy, sound-dampening curtains over the windows. Soft materials are your best friends for absorbing echoes and ambient noise.
Use Furniture Wisely: A big, fully-loaded bookshelf is one of the best sound-blockers you can have. Place it against the wall you share with the noise source.
This simple combination of adding mass (the solid door), absorbing sound (rug and curtains), and blocking sound (the bookshelf) can absolutely transform a room’s acoustics without any major construction.
When it comes to doors, which are often the biggest problem, this little decision tree can point you in the right direction.
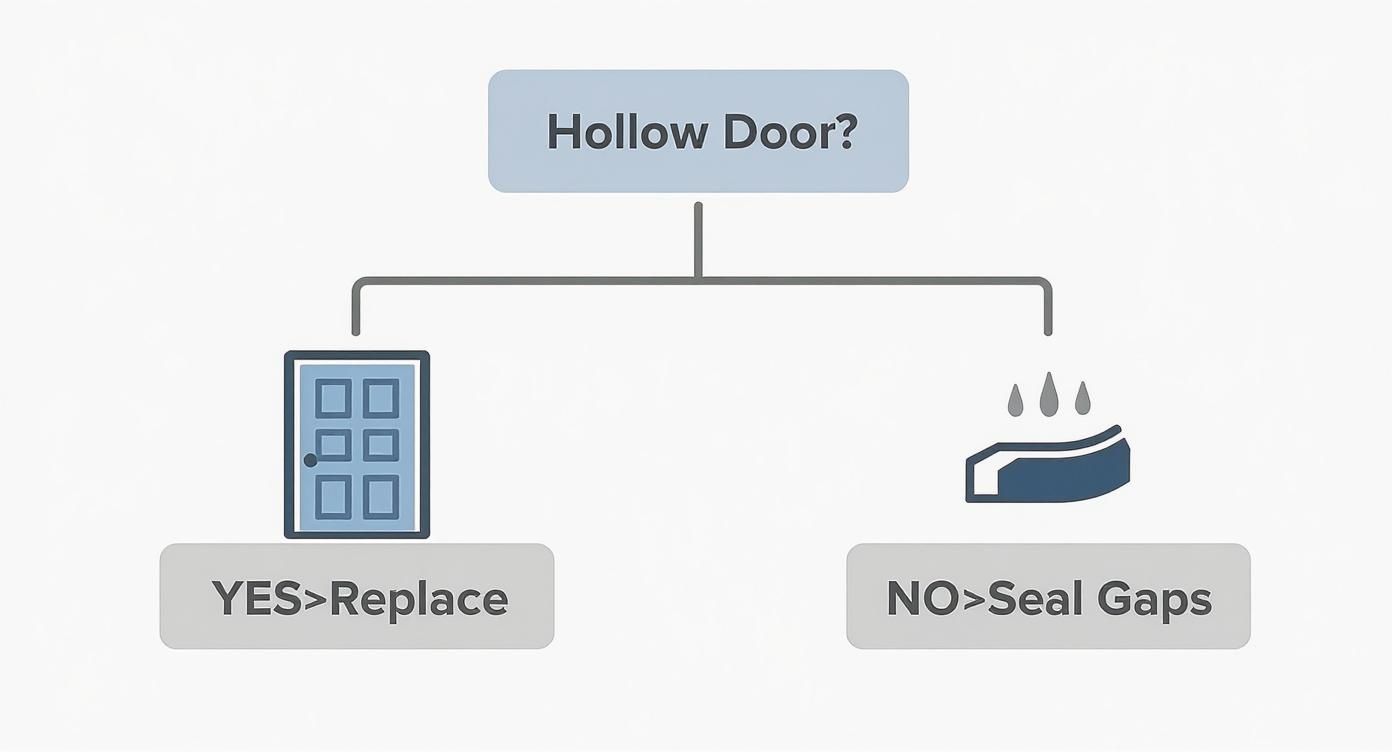
As you can see, just knowing your door type can save you from wasting money on seals and weatherstripping when what you really needed was a new door all along.
Planning for Peace From the Very Beginning
While all these DIY tips are fantastic for improving your current home, nothing beats planning for quiet from the start. If you're buying a new home that you can personalize, you have the golden opportunity to make foundational choices that bake tranquility right into the structure.
While the builder I represent provides high-quality homes, I go a step further—offering my clients unique proprietary visualization tools, hands-on service, and access to visualizers that help you bring your dream space to life.
When I work with clients looking at homes in communities like White Marsh, Edgewood, and across Harford and Prince George's Counties, we don't leave quiet to chance. Because we let buyers customize their homes by picking their flooring, countertops, and cabinets, we can have a real conversation about acoustics. We can use our visualization tools to see how upgrading to solid-core doors or selecting specific flooring will affect the sound levels in your space. This hands-on service helps you build a home that's not just beautiful but also perfectly suited to your lifestyle.
Got Questions About Soundproofing? I've Got Answers.
When you start digging into a soundproofing project, a ton of questions pop up. I’ve been helping people design their dream homes for years, and trust me, I’ve heard a lot of them. Let's tackle some of the most common ones that come up when homeowners decide they're ready for a little more peace and quiet.
So, What’s This Going to Cost Me?
This is always the first question, and the honest-to-goodness answer is: it really depends. But the good news is you can make a real dent in the noise on just about any budget. It's all about picking your battles.
On a Shoestring Budget ($100 - $200): If you're just getting started, you can focus on the biggest culprits. For a couple hundred bucks, you can grab some quality weatherstripping for your door frame, a solid door sweep to plug the gap underneath, and maybe even a thick, plush rug to soak up sound. You’d be shocked at how much these small fixes can accomplish.
Mid-Range Solutions ($300 - $800): Got a bit more to spend? This is where you can get some high-quality soundproof curtains to deal with a noisy window or place some acoustic panels to finally kill that annoying echo in your home office.
Going All In ($1,000 - $3,000+): For those serious noise problems, you'll need to invest more. We're talking about adding materials like mass-loaded vinyl and a second layer of drywall. This is a much bigger project and the cost can climb, especially if you decide to call in a pro to handle the installation.
Will Soundproofing Actually Increase My Home's Value?
Yes, it absolutely can. It might not be as flashy as a kitchen remodel, but a well-soundproofed room is a huge boost to your quality of life—and that’s a powerful selling point.
Just put yourself in a buyer's shoes for a second. Imagine touring a home and discovering a quiet nursery, a home office where you can actually concentrate, or a home theater that won't wake the kids. These are the kinds of features that make a house feel like a high-quality, thoughtfully designed home.
Especially in busy areas like Baltimore County or Harford County, a peaceful retreat is a premium feature. It tells buyers you’ve invested in making the house a true sanctuary, and that's something they'll remember.
What’s the Difference Between Acoustic Panels and Mass-Loaded Vinyl?
This is a great question because it gets right to the core of soundproofing: are you trying to absorb sound or block it?
Acoustic panels are all about absorption. Think of them like sponges for sound. Made of materials like foam or mineral wool, their job is to soak up sound waves bouncing around inside a room. This kills echo and reverb, making everything sound clearer. They're perfect for improving the sound in your home theater or taming that cavernous echo in a room with hardwood floors.
Mass-loaded vinyl (MLV), on the other hand, is purely for blocking. This stuff is thin but incredibly heavy and dense. You install it inside a wall to add sheer mass, creating a powerful barrier that stops sound dead in its tracks from passing from one room to the next.
A simple way to think about it: You’d use MLV to stop your teenager's music from leaking into the living room. You’d use acoustic panels to make the music sound better inside their room. They solve two completely different problems but work brilliantly together.
Knowing which tool to use for your specific noise issue is half the battle. Get this right, and you're well on your way to the quiet you've been dreaming of.
A perfect home is a peaceful one. While these DIY tips can work wonders, having the chance to make sound-conscious choices when customizing a new home is a game-changer. I work with my clients using unique visualization tools and a hands-on approach to design a home that fits their life perfectly—from the acoustics to the countertops. If you’re dreaming of a new home in Maryland communities like White Marsh, Edgewood, or anywhere in Baltimore, Harford, or Prince George's County, let's talk about making it a reality. You can see what's possible at https://www.customizeyourhome.com.
Comments