
How to Plan a Home Addition: Your Complete Guide
- Justin McCurdy

- Oct 17, 2025
- 16 min read
Planning a home addition is really about turning that daydream of "more space" into a real, functional, and beautiful part of your home. It all starts with figuring out why you need the addition in the first place. That "why" becomes the north star for your budget, your design, and every single choice you make down the line.
Translating Your Dreams Into a Concrete Plan

Before anyone even thinks about swinging a hammer, the most important work happens on paper and in conversation. You have to get crystal clear on your vision. This isn't just about bolting on more square footage; it’s about making your home work better for the way you actually live.
Think about the real pain points in your current home. Are you constantly shuffling things off the kitchen table so the kids can do their homework? A dedicated home office or even a small study nook could be the answer. For a growing family I worked with in White Marsh, Maryland, the goal was a huge great room where everyone could pile in for movie nights. But for another client over in Edgewood, the priority was completely different—they were planning ahead with a main-floor in-law suite.
Defining Your Primary Goals
Start by asking yourself some tough questions. What specific problems is your current layout causing? What do you wish you had a proper space for? Answering these honestly helps you lock in the true purpose of your new addition.
Growing Family Needs: Will that new playroom today need to transform into a teen hangout spot in five years? Thinking about that flexibility now is a game-changer.
Lifestyle Enhancement: Are you dreaming of a sunroom for your morning coffee, a bigger kitchen to host holidays, or a quiet primary suite to finally get some peace?
Solving a Problem: Is the main goal simply to add a much-needed second bathroom, create a real mudroom to contain the chaos, or build a legitimate home office?
I had a client in Baltimore County who just wanted to expand their kitchen. Their initial thought was simply "make it bigger." But after we talked it through, we pinpointed their real goals: a massive island for casual family meals and a better connection to their back patio. That clarity completely changed the design from a basic box extension to a seamless indoor-outdoor living space they use constantly.
Separating Must-Haves From Nice-to-Haves
Once you know your "why," it's time for an essential exercise: making two lists. The first is your list of non-negotiables, and the second is your "would-be-amazing-if-we-can" list. Trust me, this will save you so many headaches when it's time to talk budget.
Your must-haves are the things that solve your core problem. Your nice-to-haves are the bells and whistles you'd love if the numbers work out.
Key Takeaway: A great home addition isn't measured just in square feet, but in how perfectly it fits your family's needs. Nailing down your specific goals from day one ensures every dollar you spend directly improves your daily life.
Let's say you're planning that primary suite addition. Your lists might look something like this:
Must-Haves List:
A bedroom that easily fits a king-sized bed
A true walk-in closet
An en-suite bathroom with a double vanity
Nice-to-Haves List:
A freestanding soaking tub
Heated floors in the bathroom
A small private balcony
A built-in coffee bar
This simple separation makes decisions so much easier later on. You'll know exactly where your money needs to go and where you have room to compromise. Getting these details right is the first step before you even think about architectural plans. If you're new to all this, learning how to read house blueprints is a great homebuyer's guide to get comfortable with the process.
This is the part of the process I love most with my clients. We can use visualization tools to play with different layouts and see how your choices for flooring, cabinets, and countertops all come together. It's about more than just picking out materials; it's about making sure the finished room feels exactly like you've been imagining.
Creating a Realistic Budget for Your Addition
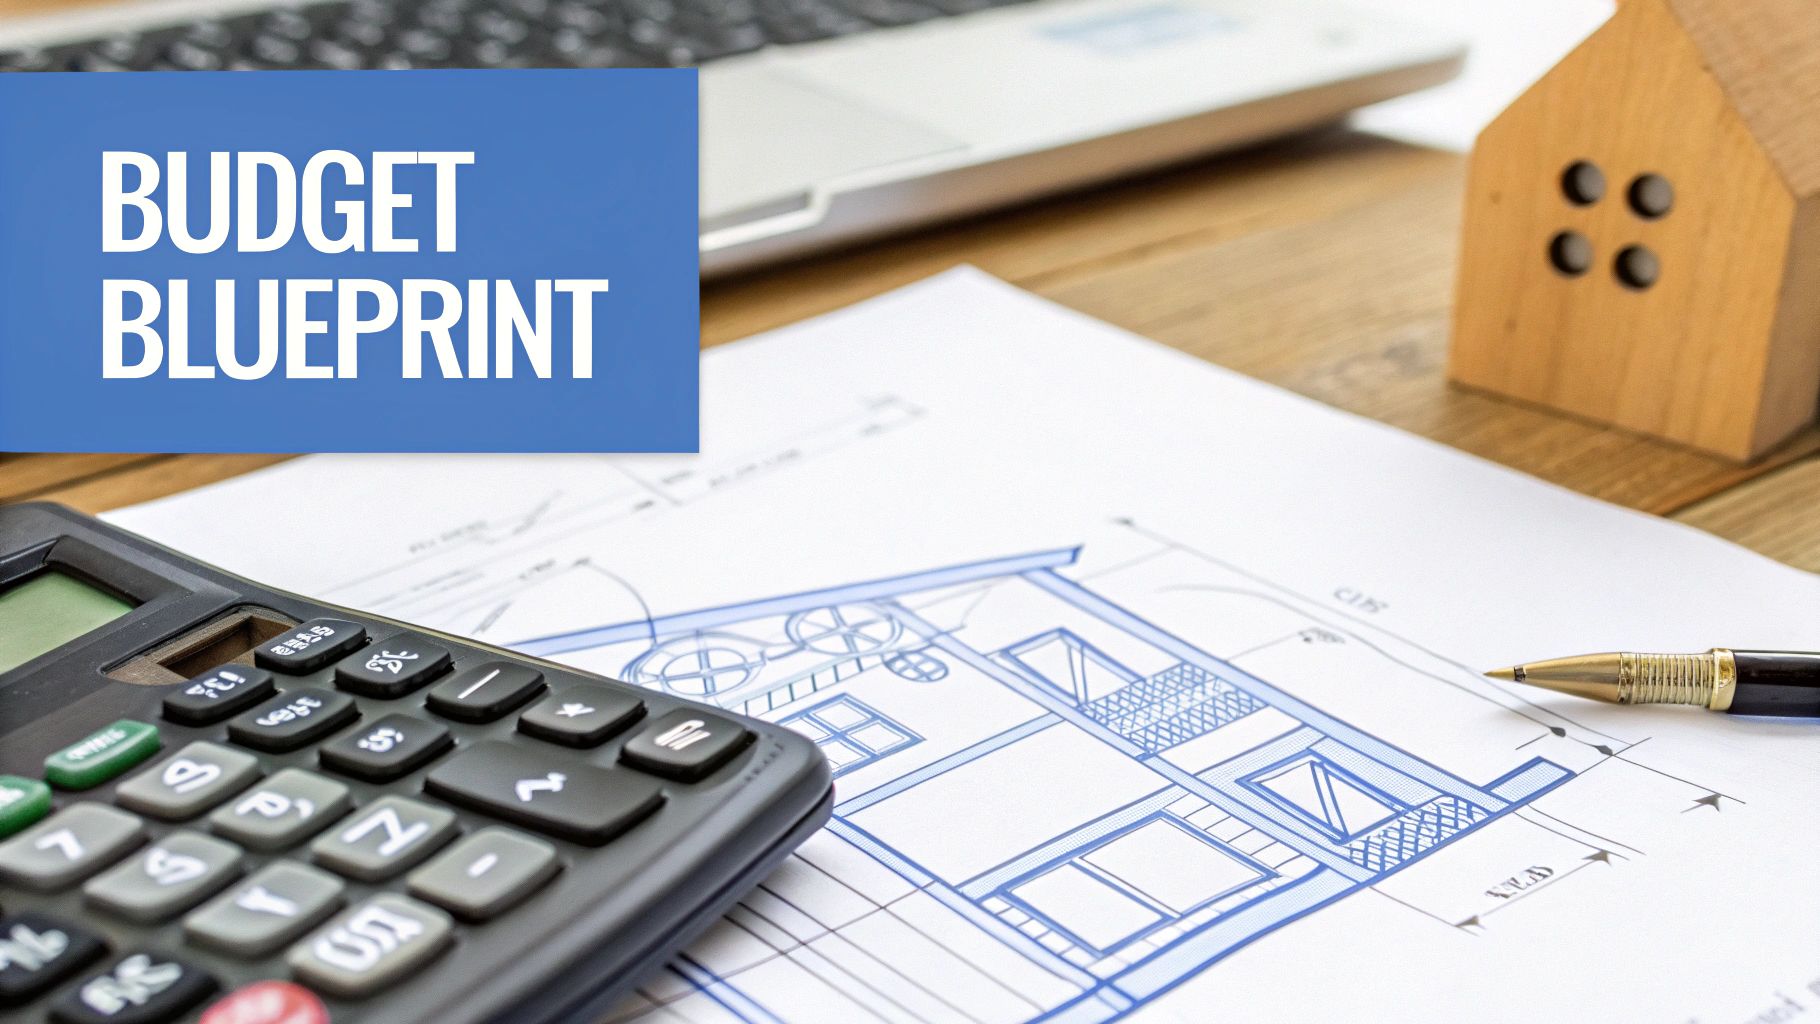
Alright, you’ve got the vision. Now for the part that can feel a little intimidating: the budget. Let’s be honest, talking numbers isn’t always fun, but hammering out a realistic financial plan is probably the single most important thing you can do to make sure this project is a success, not a source of stress. This is where we get granular and move past the back-of-the-napkin math.
It’s a great time to be investing in your home, too. The home remodeling market is booming—it was valued at around $950 billion in 2023 and is only expected to climb. People everywhere are craving more functional and modern living spaces, which is exactly what a smart addition delivers.
Deconstructing the Total Cost
One of the biggest mistakes I see homeowners make is only budgeting for the obvious stuff, like lumber and windows. But a real-world budget has to account for every single piece of the puzzle, big and small. To get an accurate picture, you need to break it down.
Here’s how the costs generally shake out:
Hard Costs: This is the meat and potatoes of your budget. It’s all the physical construction—the materials like framing and roofing, plus the labor to put it all together.
Soft Costs: These are the critical behind-the-scenes expenses. Think architectural plans, structural engineering reports, and those all-important building permits for your Maryland county.
Finishes and Fixtures: This is where you get to inject your personal style. It’s everything from the kitchen cabinets and countertops to the tile, vanities, and light fixtures for a new bathroom.
The Contingency Fund: Please, do not skip this. Your contingency fund is your safety net. You absolutely must set aside an extra 10-20% of your total project cost for the unexpected. Trust me, surprises happen—like opening a wall and finding old wiring that needs a complete overhaul.
Building a budget is like creating a detailed roadmap. Without it, you're just guessing at the destination. A well-planned budget gives you control, clarity, and the confidence to move forward without financial surprises.
For a deeper dive, this expert's guide to budgeting for home renovation is a fantastic resource. It gives you a solid framework for thinking through all the potential expenses you'll run into.
Real-World Budget Ranges in Maryland
So, what does this actually look like on paper? Well, a simple sunroom in Harford County is going to have a wildly different price tag than a sprawling primary suite with a spa-like bathroom in Prince George's County. The complexity of the job and the level of finishes you choose are the real cost drivers.
Just as an example, a basic 400-square-foot family room addition might land somewhere in the $80,000 - $120,000 range. But take that same square footage and turn it into a kitchen, and you could easily be looking at $150,000+ once you factor in high-end plumbing, electrical, upgraded cabinets, and appliances.
This is why we get so hands-on in the planning phase. We show you exactly how choosing a different countertop or flooring option impacts the bottom line. It’s all about helping you make informed decisions that you feel great about.
How to Pay for Your Addition
Once you have a solid budget estimate, the next big question is how to fund it. Most people don’t pay for a project this size completely out of pocket, and that’s perfectly normal. Luckily, you have some great financing options.
Common Financing Options:
Home Equity Loan (HEL): This is a straightforward loan where you borrow a fixed amount against your home’s equity. You get the money in one lump sum, making it a great choice if you know the exact project cost and want a predictable monthly payment.
Home Equity Line of Credit (HELOC): Think of this more like a credit card. You’re approved for a maximum amount and can draw from it as needed throughout the project. The flexibility is perfect for additions where costs might ebb and flow.
Cash-Out Refinance: With this, you replace your current mortgage with a new, larger one and pocket the difference in cash. It can be a really smart move if you’re also able to lock in a lower interest rate on your mortgage.
Construction Loan: For really big projects, a dedicated construction loan might be the way to go. These are short-term loans designed to cover building costs and are typically converted into a regular mortgage once the dust settles. If you're considering this route, our guide on home construction loans made simple is a must-read.
Ultimately, choosing how to finance your addition is a personal decision. It all comes down to your financial situation and comfort level. But having that solid budget in hand is the essential first step to getting the funding you need to make it happen.
Turning Your Vision into Blueprints and Getting the Green Light
Alright, you’ve got your goals locked in and a budget you can work with. Now for the fun part: turning those daydreams into a real, buildable plan. This is the moment your vision starts to look less like a wish list and more like a future reality.
Bringing in an architect or a skilled designer is absolutely essential here. They are the ones who will translate your ideas into a design that's not just beautiful but also structurally sound and, crucially, compliant with all the local codes.
Think of these official plans as the bible for your project. Professional detailed construction drawings are what everyone—from the permit office to the framers—will use to make sure your addition is built correctly. Without them, you’re just winging it, and that’s a recipe for disaster.
It's no secret that homeowners are investing heavily in their properties. Projections show the U.S. home improvement market is expected to hit a massive $509 billion in 2025. People aren't just splurging on aesthetics; they're making smart upgrades for energy efficiency and safety alongside popular projects like kitchen expansions. This is all worth keeping in mind as you nail down your own design.
From a Napkin Sketch to a Real Blueprint
The design process is really a collaboration. It’s a bit of a dance between what you want and what an expert knows is possible (and practical). You'll likely start with some rough sketches, playing around with different layouts and figuring out how the new space will connect and flow with your existing home.
A great designer does more than just draw walls. They get into the nitty-gritty of how you actually live. They’ll ask questions you might not have even thought of, like where the afternoon sun hits so they can place windows for the best natural light, or how to arrange a kitchen island so you’re not constantly bumping into it. It's their job to sweat the small stuff, from HVAC runs to structural support beams.
Key Takeaway: Your architectural plans are the master instruction manual for your home addition. Every single detail, from outlet placement to the size of a support beam, is documented. This ensures the entire team is on the same page for a smooth and safe build.
Modern technology can make this stage even more exciting. For a look at how the pros do it, you might want to read up on the benefits of Building Information Modeling. This tech creates a detailed 3D digital model of your addition, letting you "walk through" the space before a single nail is hammered.
Cracking the Code on Local Permits
Once your design is finalized, you’ve got to get the official thumbs-up from your local town or county. This means diving into the world of building permits. It can feel a little intimidating, but trust me, it’s a non-negotiable step when planning a home addition.
Permits are basically your city’s way of ensuring your project is safe, meets structural standards, and follows local zoning laws. Trying to skip this step is a huge gamble. You could face massive fines, be forced to tear down all your hard work, and run into major headaches when you eventually try to sell your home.
The permit process can be wildly different depending on where you live.
In Baltimore County, MD, you might run into specific rules about stormwater management or guidelines for historic districts.
Just next door in Harford County, MD, the setback rules (how close you can build to your property line) could be totally different.
Even within a county, communities like Edgewood or White Marsh, MD, can have their own unique local ordinances.
Your builder or architect will usually be the one to handle the paperwork and submit the plans, but it’s smart for you to understand the process. They’ll take your detailed blueprints to the local building department, where an inspector will review everything for compliance—from fire safety codes to energy efficiency standards.
Be prepared to wait. This review can take anywhere from a few weeks to several months, so you absolutely have to factor that time into your project schedule.
Assembling Your Team and Choosing Materials

With a solid plan in hand, it’s time to bring in the pros who will turn those blueprints into a physical part of your home. A project’s success really hinges on the skill and communication of your team, so this is a decision you want to get right.
From the general contractor steering the ship to the subcontractors handling specific trades, getting the right crew on board is one of the most important parts of planning a home addition.
Finding the Right Professionals
Finding a good builder is about way more than just getting the lowest bid. You’re basically entering a partnership that will last for months, so you need someone you can trust and talk to easily. Think of it like a job interview where you're the hiring manager.
A great place to start is by asking for recommendations from friends, family, or neighbors who’ve had similar work done recently. You can also check with local building supply stores for leads. Once you have a shortlist of three or four potential builders, it's time to do some homework.
Key Questions to Ask Potential Builders:
Are you licensed and insured in Maryland? (This is an absolute must-have.)
Can you give me a list of recent client references I can talk to?
How do you handle communication and project updates? (You're looking for a clear, consistent process here.)
What’s your approach to unexpected issues or change orders?
Can you show me a portfolio of work that’s similar to my project?
When you check their references, don't just ask if they were happy with the final product. Dig deeper. Ask about how the builder handled challenges, if they stayed on budget, and if their crew was respectful of the home. These kinds of insights are invaluable.
The Fun Part: Choosing Your Materials
Once you have your team in place, you get to move on to one of the most exciting parts of the whole process: selecting the finishes that will define your new space. This is where your personal style really comes to life, and it’s an area where we do things differently.
While the builder I represent provides high-quality homes, I go a step further—offering my clients unique customization tools, hands-on service, and access to visualizers that help you bring your dream space to life. We believe that personalization is what makes a space feel like yours. That's why we guide you through picking your own flooring, countertops, cabinets, and tile, making sure the final result is a perfect match for your vision.
Your material choices do more than just make your addition look good—they define its durability, maintenance needs, and the overall feel of the room. This is your chance to make the space uniquely yours.
Let's dive into some of the common choices you'll be making.
Material Customization Options Comparison
Here's a look at some popular material choices you can make to personalize your new addition, comparing them based on durability, upkeep, and overall style.
Material Type | Popular Options | Best For | Key Considerations |
|---|---|---|---|
Countertops | Quartz, Granite, Marble | Kitchens and bathrooms | Quartz is super low-maintenance, while Granite offers unique natural patterns. Marble is stunning but needs more care. |
Flooring | Luxury Vinyl Plank (LVP), Hardwood | High-traffic areas, living spaces | LVP is incredibly durable and waterproof. Hardwood adds timeless warmth but is more susceptible to scratches. |
Cabinets | Shaker-style, Flat-panel | Kitchens, bathrooms, built-ins | Consider both the style and construction. Soft-close hinges and durable finishes are worth the investment. |
Tile | Ceramic, Porcelain, Natural Stone | Bathroom floors, showers, backsplashes | Porcelain is denser and more water-resistant than ceramic. Natural stone like travertine offers a rustic, earthy look. |
Choosing the right material really comes down to your lifestyle and aesthetic. A family in White Marsh, MD with young kids and a dog might choose LVP flooring for their new great room. It gives them the look of hardwood without the worry of scratches or spills. On the other hand, a homeowner in Baltimore County planning a high-end kitchen addition might opt for the classic elegance of granite countertops and Shaker cabinets.
The best part of our process is that you don't have to guess how these selections will look together. We give you access to visualization tools that let you mix and match your chosen materials digitally. You can see how that quartz countertop pairs with your cabinet color and flooring before making a final commitment.
This eliminates any "what if" moments and gives you complete confidence in your design, ensuring your dream space becomes a reality, exactly as you envisioned it.
Understanding the Project Timeline
Alright, let's talk about what happens when the plans are done and the hammers start swinging. Knowing the general flow of a construction project is the secret to keeping your sanity. Once the contracts are signed and the team is ready, your addition moves from paper to reality, and a whole new set of questions pops up.
So, what can you actually expect? A home addition doesn't happen overnight; it’s a sequence of carefully timed steps. Every single stage, from digging the foundation to that final coat of paint, builds on the one before it.
The Major Phases of Construction
I like to think of the construction process in three main acts. First up is all the heavy, dirty work—the stuff that anchors your new space to the ground. Next, you’ll see the structure take shape and all the guts (plumbing, electrical) get installed. Finally, it's time for the fun part: all the beautiful finishes you agonized over finally come together.
Let’s use a hypothetical 400-square-foot family room addition as our example to walk through the key phases.
Phase 1: Foundation and Site Work. This is where it all begins. Your yard becomes a construction site as the ground is excavated, footers are poured, and the foundation walls go up. This part is super dependent on weather, so it can take anywhere from one to three weeks. A solid week of rain can really slow things down here.
Phase 2: Framing and Rough-ins. Suddenly, it looks like a real room! The walls and roof get framed, and windows are installed. Shortly after, the space is buzzing with activity as plumbers and electricians run all the pipes and wires through the open walls. This "rough-in" stage is a busy one, often lasting three to five weeks.
Phase 3: Finishing Touches. Once the rough-in work passes inspection, the real transformation begins. Insulation and drywall go in, turning the skeleton into a room. Then comes the flooring, cabinets, countertops, and light fixtures. This final stretch, which includes all the painting and the final walkthrough, usually takes another three to four weeks.
This gives you a pretty good bird's-eye view of how a standard addition project moves along.
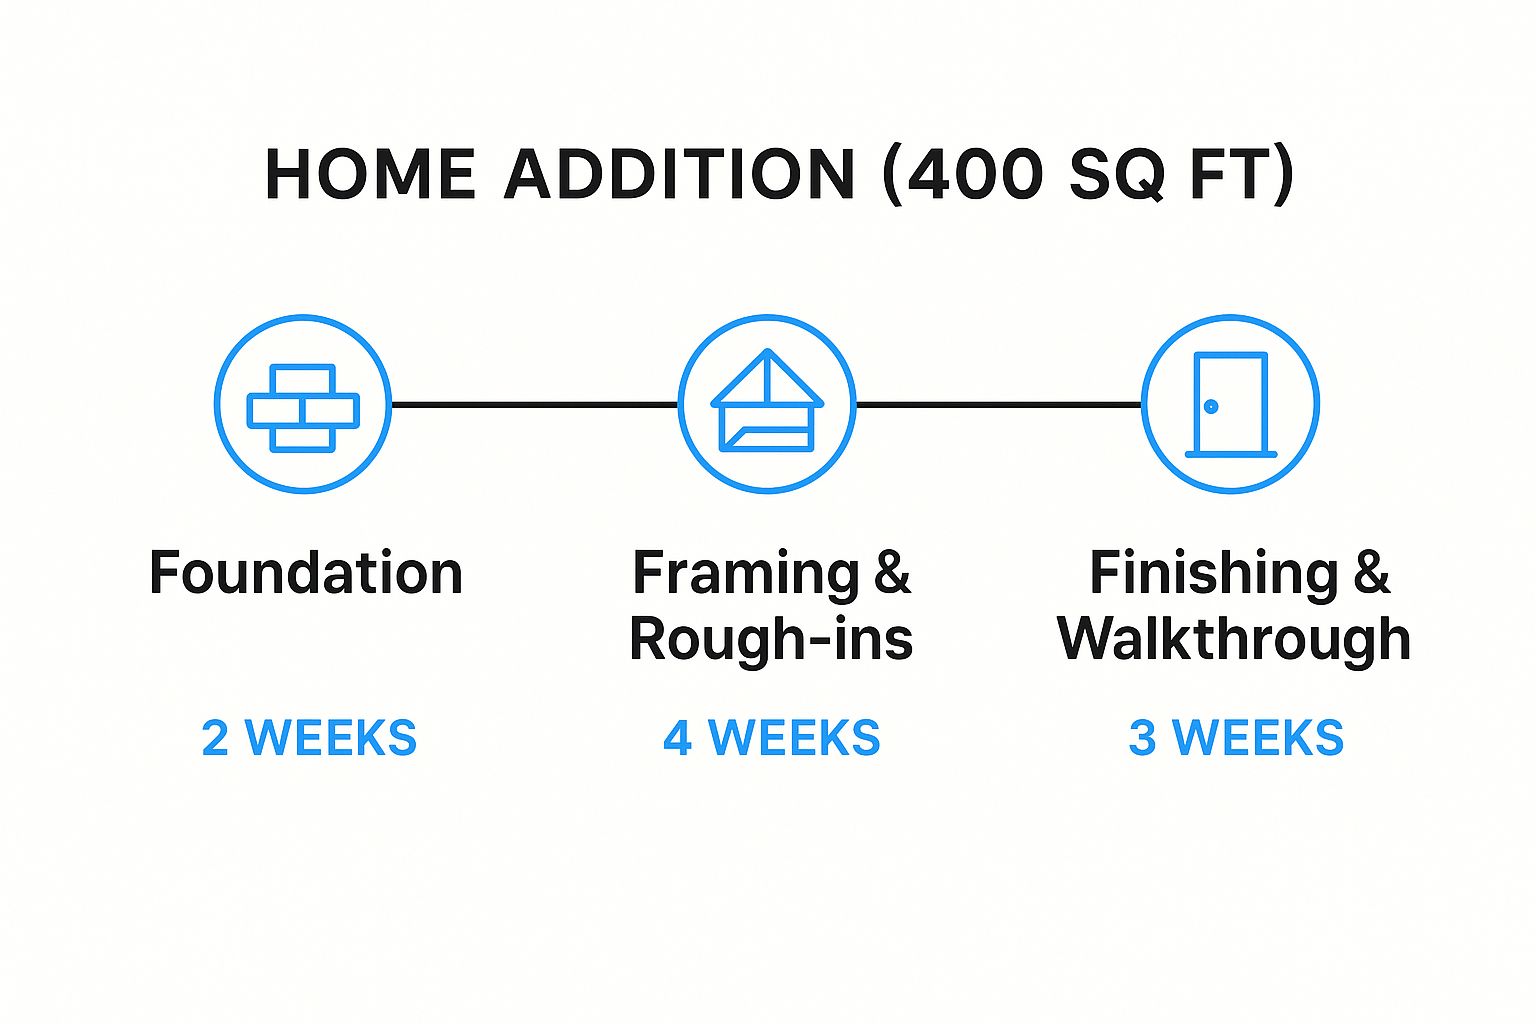
As you can see, even a straightforward project will likely involve about nine weeks of active construction—and that’s before accounting for any unexpected hiccups.
Managing Expectations and Daily Life
Living through a renovation requires patience. There's just no way around it. You're going to have noise, dust, and a parade of people in and out of your house. The absolute best way to manage the disruption is to have clear, open communication with your builder. A good one will give you weekly updates so you always know who's showing up and what's getting done.
It's also a great time to be investing in your property. The global home renovation market is projected to hit a staggering $2,659.60 billion by 2032, fueled by homeowners just like you who are adding real value and function to their properties. By planning this addition, you're right on trend.
Key Takeaway: Understanding the sequence of a home addition helps you manage expectations. Timelines can (and do) shift due to weather, material delays, or inspections, but knowing the general flow keeps you prepared and makes the whole process far less stressful.
Preparing your family for the temporary chaos is just as important as preparing the site. Try to set up a "safe zone" away from the construction area where you can all decompress. If the project messes with your kitchen, get creative with a temporary cooking station using a microwave, a hot plate, and your trusty coffeemaker. You’d be surprised how much these little adjustments can help.
While every project has its own unique quirks, this framework should give you a solid idea of what's ahead. For an even more detailed breakdown, you might want to check out our guide that explains the full new home construction timeline. At the end of the day, a little preparation goes a long way in making your home addition a great experience.
Got Questions About Your Home Addition? We've Got Answers.
Thinking about an addition is a huge step, and it’s totally normal to have a million questions swirling around. We get it. Let's tackle some of the most common ones we hear from homeowners to help clear things up.
How Long Does an Addition Really Take?
This is the big one, right? The honest answer is: it varies. A straightforward, single-room addition might wrap up in 3-4 months, from the first sketch to the final coat of paint. But if you're planning something more complex, like a multi-room or second-story addition, you're realistically looking at 6-12 months, maybe even longer.
It's not just about the construction itself. The total timeline breaks down into a few key stages:
Design & Planning: This is where we nail down your vision. It can take 1-3 months of back-and-forth to get the plans just right.
Permitting: Getting the official green light from your local municipality in places like Baltimore or Harford County can easily add another 1-2 months. This part is often a waiting game.
Construction: The actual build-out is usually the longest phase, running anywhere from 3-6 months or more, depending on what we're building.
And remember, things like unexpected weather, supply chain hiccups for materials, and waiting on city inspectors can always tweak the schedule a bit.
What's the Average Cost Per Square Foot in Maryland?
Ah, the "cost per square foot" question. While it seems like a simple way to budget, it can be pretty misleading. The truth is, the cost depends entirely on what you're building and the finishes you pick.
Here in Maryland, you could see a range from $150-$200 per square foot for a very simple build-out to well over $400 per square foot for a high-end space. Think about it this way: a basic family room is going to cost far less per foot than a new kitchen, which is packed with expensive plumbing, electrical, upgraded cabinets, and stone countertops.
A detailed, itemized quote is always better than a simple square-foot estimate. It shows you exactly where every dollar is going and helps you sidestep that dreaded sticker shock down the road.
Can I Live in My House During Construction?
For most projects, absolutely. We're experts at creating a "bubble" around the construction zone to keep your living space as clean and separate as possible. We use plastic dust barriers, protect your floors, and manage the site to minimize the mess.
That said, you have to be prepared for some disruption. There will be noise during the day, a bit of dust, and a crew of people at your home. If the project involves a major gut of your only kitchen or bathroom, we'll need to work with you to figure out a temporary solution. It’s all part of the plan we map out from the start.
How Will This Addition Affect My Property Taxes?
Adding valuable square footage to your home will almost certainly increase its assessed value, and yes, that means your property taxes will go up. It’s a direct result of the investment you’re making in your property.
How much? It really depends on your local tax rate and the final value the project adds. A smart move is to call your local tax assessor's office in your specific Maryland county before you start. They can often give you a ballpark idea of how a project of your size might impact your annual tax bill, so you can build that into your long-term budget.
Planning an addition is a big deal, but you don't have to go it alone. At Customize Your Home, we're all about helping families in communities like White Marsh, Edgewood, and across Baltimore and Harford Counties turn their ideas into reality. Our hands-on service and unique visualization tools let you pick every single detail—from the flooring to the faucets—and see your new space come to life before we even break ground.
Ready to see what’s possible? Visit us at https://www.customizeyourhome.com to learn more.
Comments